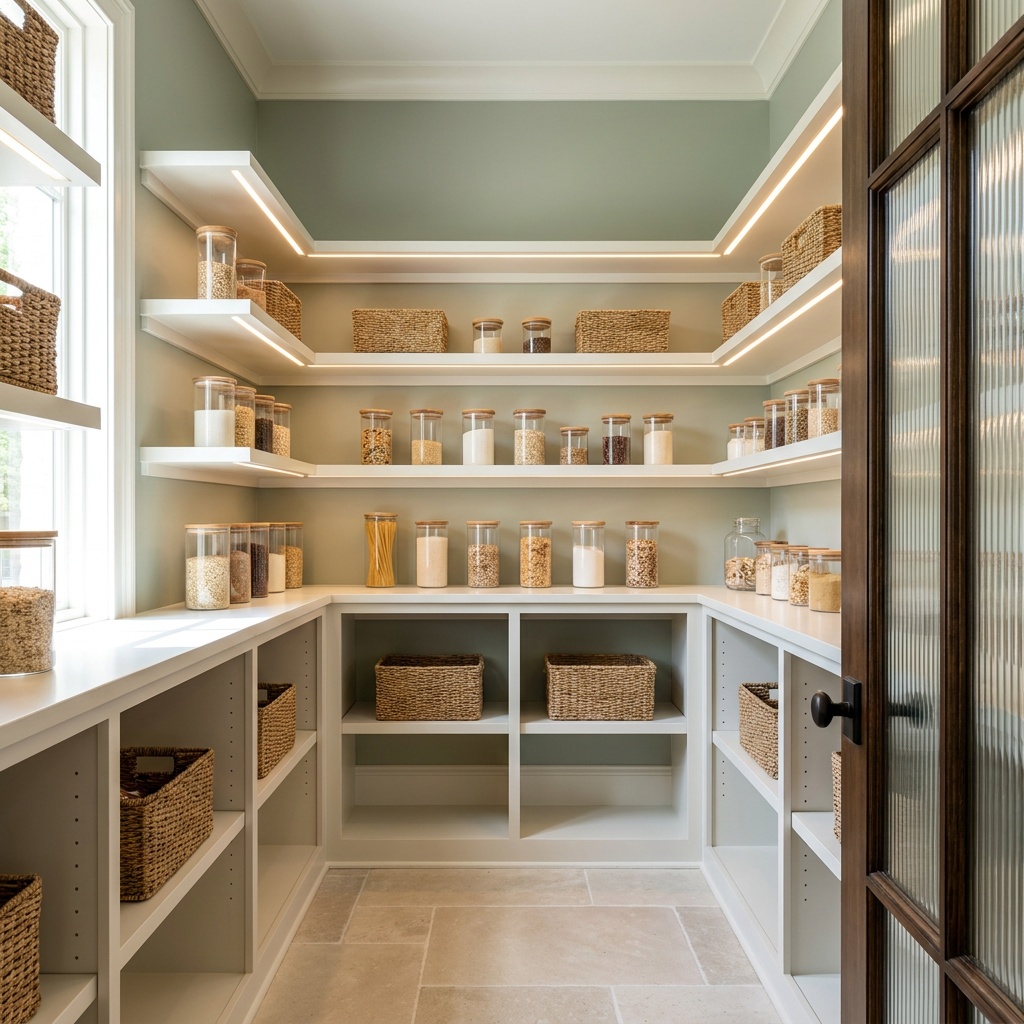
The best kitchen pantry ideas come down to three decisions: reach-in or walk-in, how deep the shelves are, and where the small appliances live. A reach-in pantry cabinet is usually 24 inches deep with roll-out trays, and it holds a surprising amount when the trays are spaced 7 to 12 inches apart. A walk-in pantry needs at least 4 feet of width for shelving on one side, and closer to 6 feet for shelving on both sides with a 36- to 42-inch aisle. Inside a walk-in, 12- to 14-inch shelves beat deeper ones, because nothing gets lost in the back. Finally, an appliance garage, a countertop cabinet with a roll-up, lift-up or pocket door and outlets inside, keeps the toaster, mixer and coffee maker plugged in and out of sight. Get those three choices right and the pantry works every day. Get them wrong and it becomes the room where groceries go to expire.
Reach-In vs. Walk-In: Which Pantry Fits Your Kitchen
Most North Atlanta homes built in the 1990s and 2000s came with a small reach-in closet, often a 2-by-2-foot corner pantry with fixed wire shelves. When homeowners ask for a pantry upgrade, the real question is whether the floor plan can give up the square footage for a walk-in, or whether a well-built cabinet pantry would do the job better.
| Factor | Reach-In Cabinet Pantry | Walk-In Pantry |
|---|---|---|
| Footprint | 18 to 36 inches wide, 24 inches deep | About 4 by 5 feet minimum; 6 by 6 feet is comfortable |
| Best shelf type | Roll-out trays or drawers | Fixed or adjustable open shelves, 12 to 14 inches deep |
| Visibility | Excellent with roll-outs; poor with fixed deep shelves | Excellent when shelves stay shallow |
| Bulk storage | Limited | Room for cases, bins and a step stool |
| Appliance storage | Possible with a countertop-height bay | Easy: a dedicated counter with outlets |
| Where it works | Galley, L-shaped and smaller kitchens | Kitchens with an adjacent closet, mudroom or hall to borrow from |
A reach-in pantry earns its keep through hardware. A tall 24-inch-deep cabinet with fixed shelves is one of the least efficient storage pieces in a kitchen, because the back half is hard to reach. Fit the same box with full-extension roll-out trays and every can comes to you. The same logic drives our thinking on drawers versus doors in base cabinets: storage you can pull out is storage you actually use.
A walk-in pantry earns its keep through volume and flexibility. It holds the paper towels in bulk, the stand mixer, the holiday platters and the case of sparkling water. The trade-off is floor space, so a walk-in usually makes sense when there is a closet, an underused hall nook or part of a laundry room next to the kitchen that can be absorbed.
Shelf Depth: The Detail That Makes or Breaks a Walk-In
The instinct is to build deep shelves, on the theory that deeper means more storage. In practice, 16- and 18-inch shelves become archaeological sites. Items get pushed behind other items, duplicates pile up, and the pantry feels full while half of it is wasted.
- Main shelves: 12 to 14 inches deep handles cereal boxes, canisters and most dry goods in a single row you can scan at a glance.
- Upper shelves: 10 to 12 inches deep, since anything above eye level is harder to see and reach.
- Lower shelves or floor zone: 16 to 20 inches deep works for bins, beverage cases and small appliances that sit on rolling platforms.
- Spacing: 10 to 14 inches between shelves for most food, with one or two taller openings of 16 to 18 inches for cereal and paper goods.
Adjustable shelving is worth insisting on. What you store changes over the years, from baby formula to sports drinks to slow-cooker season, and a pantry with fixed shelves is locked into the needs of the year it was built. A wraparound U-shaped layout with shallow shelves on three walls usually outperforms two deep walls facing each other, because the corners become usable and nothing hides behind anything else.
For spices, oils and small jars, door-mounted racks or a narrow pull-out keep things in one row. We cover those options in detail in our guide to spice storage that works.
Power, Light and Ventilation Inside the Pantry
The pantry upgrades that homeowners mention most after a remodel are not the shelves. They are the outlets and the lights.
Outlets
If small appliances will live in the pantry, plan a short run of counter at about 36 inches high, with at least two outlets above it, so the toaster oven, mixer and air fryer can stay plugged in. Outlets have to be planned during electrical rough-in, before drywall goes up; adding them later means opening walls. Your electrician and local inspector will confirm what the current electrical code requires for circuits and protection in your area.
Lighting
A single bare bulb on a pull chain is the classic pantry fixture, and it leaves every shelf in shadow. A flush-mount LED fixture is the minimum; LED strips mounted under each shelf edge or vertically along the door jambs light the shelves themselves. A door-jamb switch or motion sensor turns the light on as you walk in, which matters when your hands are full. Warm-white color temperatures around 2700K to 3000K keep the pantry consistent with the kitchen, a topic we explore in our post on under-cabinet lighting.
Airflow
Pantries in Georgia deal with humidity, and a closed room with appliances running can get warm. A louvered door, a transfer grille or a small amount of conditioned air keeps flour, crackers and chips fresher and prevents the stuffy closet smell.
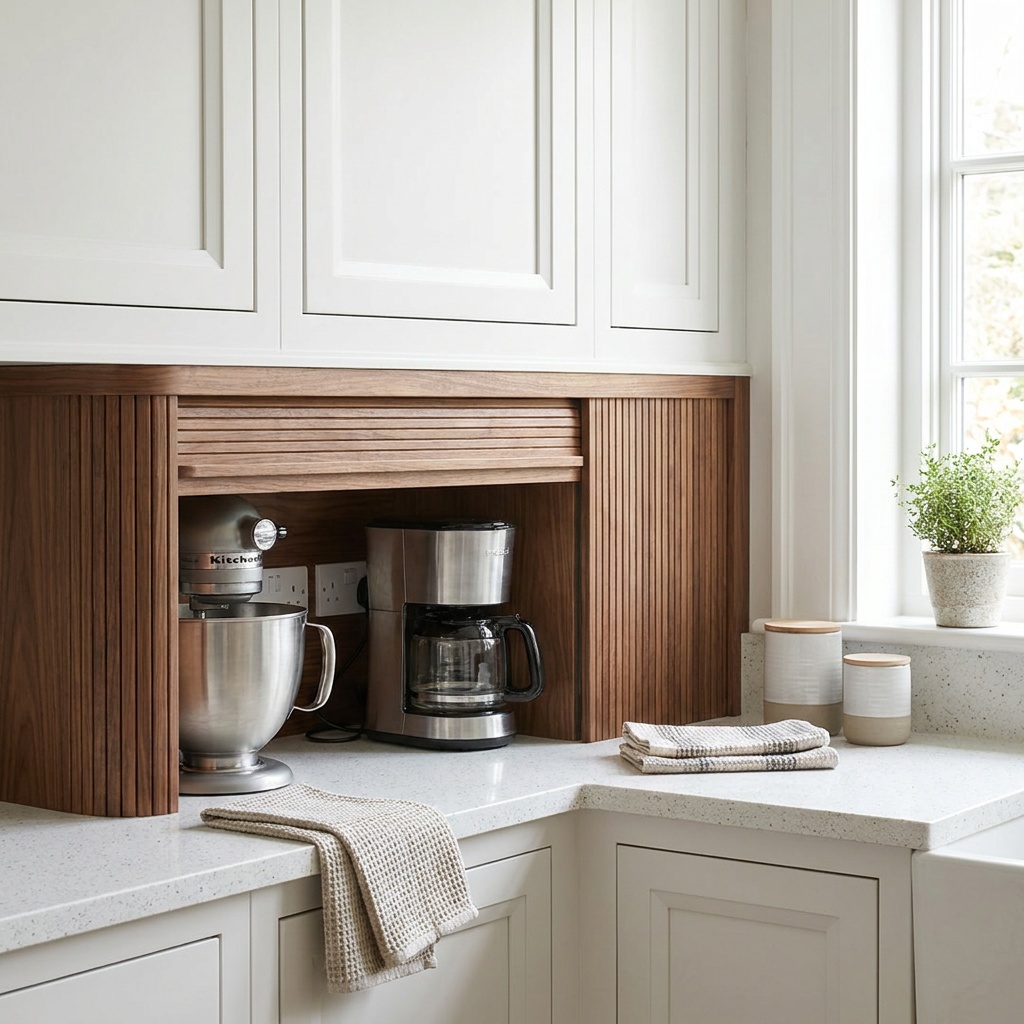
Appliance Garages: Clearing the Counter Without Losing Access
An appliance garage is a cabinet that sits on the countertop, usually tucked into a corner or between upper cabinets, with a door that hides small appliances while keeping them ready to use. Done well, it gives you a clean counter line without the daily chore of hauling a heavy mixer out of a base cabinet. The key is choosing a door that suits how often you reach in.
Tambour (Roll-Up) Doors
Tambour doors are made of slats that roll up into the cabinet, like a rolltop desk. They need no clearance in front, so you can open one while a cutting board sits on the counter.
Lift-Up Doors
A lift-up door rises on a mechanism and stays open above the opening. It gives a wide, clear view of everything inside and keeps the door out of the way during prep. It works best when the garage sits under a cabinet or a shelf with enough height above for the door to clear.
Pocket Doors
Pocket doors swing open and then slide back into the cabinet sides, leaving the entire opening clear. This is a favorite for coffee stations and larger garages, where you want the counter inside to feel like part of the main workspace. The pockets take up a few inches of interior width on each side, so plan the box accordingly.
Standard Hinged Doors
Matching hinged doors make the appliance garage disappear into the rest of the cabinetry. The trade-off is swing clearance: an open door can block the counter in front of it, so this style works best at the end of a run.
Sizing and Placing an Appliance Garage
Start with the appliances, not the cabinet. Measure the tallest item you plan to store, usually a stand mixer with its head tilted or a coffee maker with its lid open, and add a few inches. Common interior heights run 15 to 18 inches, which suits most mixers and toaster ovens.
- Depth: Most garages are as deep as the counter allows, often with a pull-out tray or shelf so the mixer slides forward without lifting.
- Outlets inside: Plan at least one duplex outlet inside the garage at counter height, so appliances stay plugged in. Some homeowners add a switched outlet or a safety device that cuts power when the door closes.
- Heat and steam: Toasters, toaster ovens and coffee makers give off heat and moisture. Use them with the door open, and choose a heat-resistant interior finish.
- Location: Near the prep zone for a mixer, near the sink or fridge for a coffee station. Corners are a natural spot because corner counter space is often hard to use anyway; see our ideas for corner cabinets that do not waste space.
An appliance garage can also become a full beverage center, with a water line, a small sink or a plumbed coffee machine. Our guide to designing a coffee bar or beverage station covers that version.
Planning a Pantry as Part of a Kitchen Remodel
A pantry is most efficient to build when it is part of a larger kitchen project, because the walls are already open for electrical work and the cabinetry is being designed as one system. In many Johns Creek and Milton homes, the space for a walk-in comes from a coat closet, part of a laundry room or a hallway that was never well used. A kitchen remodel in Johns Creek or a nearby city often includes exactly this kind of reworking.
If you are weighing a pantry as part of a broader project, our Alpharetta kitchen remodel cost guide explains what drives the overall scope. The pantry itself is shaped by layout, storage hardware and electrical needs, and those are the details worth working through in a design consultation.
Frequently Asked Questions
How big does a walk-in pantry need to be?
A walk-in pantry with shelves on one wall needs about 4 feet of width, which leaves room for 12-inch shelving and a comfortable aisle. Shelving on two facing walls usually calls for about 5 1/2 to 6 feet of width, depending on shelf depth, to preserve a 36- to 42-inch walkway. A U-shaped layout with shelves on three walls is the most efficient when the room is roughly square, since the corners become usable and every item sits in a single row.
How deep should pantry shelves be?
Most pantry shelves work best at 12 to 14 inches deep. That depth fits cereal boxes, canisters and canned goods in one row, so nothing hides behind anything else. Upper shelves can drop to 10 or 12 inches, since they are harder to see into. Deeper shelves of 16 to 20 inches are useful near the floor for bins, beverage cases and small appliances. Adjustable shelving lets you change spacing as your storage needs change.
What is an appliance garage?
An appliance garage is a countertop cabinet that hides small appliances such as a stand mixer, toaster or coffee maker behind a door. The most common door styles are tambour roll-up doors, lift-up doors, pocket doors and standard hinged doors. A well-designed appliance garage includes outlets inside so appliances stay plugged in, plus enough interior height for the tallest item. It keeps the counter clear while leaving everyday appliances ready to use.
Should a pantry have electrical outlets?
Yes, if any appliances will be used or charged inside it. Plan at least two outlets above a counter-height surface for items like a toaster oven or air fryer, and consider a floor-level outlet for a cordless vacuum. Outlets need to be planned during electrical rough-in, before the walls are closed. Your electrician and local inspector will confirm the circuit and protection requirements that apply in your area.
Plan Your Pantry With Us
Whether you want a reach-in pantry with roll-outs, a walk-in carved from an unused closet or a clean appliance garage beside the range, the details are what make it work every day. Book a design consultation or call 404-640-2361 to talk through your kitchen. You can also explore more ideas on our kitchen and bath remodeling home page.